Last month I created a super cute Decoupage Art for Julia's nusery. It was an Owl sitting on a Turtle sitting on an Elephant....remember? If not, go
here! After posting the tutorial I had such great feedback! Thank you to everyone!! Since then, my friend
Angie has asked me to do a little something similar for her twin girls room! She is converting the room from a "baby" room to a "big girl toddler" room! So of course, I was super excited to start on this project!! I have assembled a great step by step picture tutorial for you!! Be Prepared!! I have LOTS of pictures to share!!!...Here we go!!!
Step ONE: Find your inspiration!!!.....this is a curtain panel that hangs in the girls room! Talk about bold color!! I LOVE IT!!!!
Step TWO: Make a Plan!! Ok, so now that I know the color palate to work with I need to come up with the design...Angie's only suggestions were to make the art big, with lots of color, possible using flowers.....sooo with that info, i started sketching......this is what my brain came up with.....
(I wanted the flower to look over-sized, and I like how the big one goes off the page)
Random Side note: I wanted this art to be slightly different than the animal art I previously did....I am stepping outside my comfort zone here.....I have decided to "try" a 3D decoupage piece of art! I am envisioning textures and movement (not just flat pieces of paper glued on top of each other)....not sure how it will turn out, but I say lets give it a try!!
Step THREE: Buy your supplies!! You will need:
A piece of wood (mine was cut to a 30x30 size)
Wood Primer
Decorative scrapbook paper
Modpodge
Scissors
Step FOUR: Take your piece of wood and spray one side of it with the wood primer. You may be wondering why I am using wood instead of canvas for my base.....Well.....When I did the animal art for Julia, I had a hard time getting the modpodge to stick to the canvas because of the seal that was already on there....soo I'm experimenting with wood!
Step FIVE: Choose your background paper, start ripping it up, and Modpodge it down.....Remember to take your time, glue down each piece, then put a layer on top to seal it!
This is what it should look like when you finish.....
By ripping up the paper before Modpodging it down, it creates so much texture!!
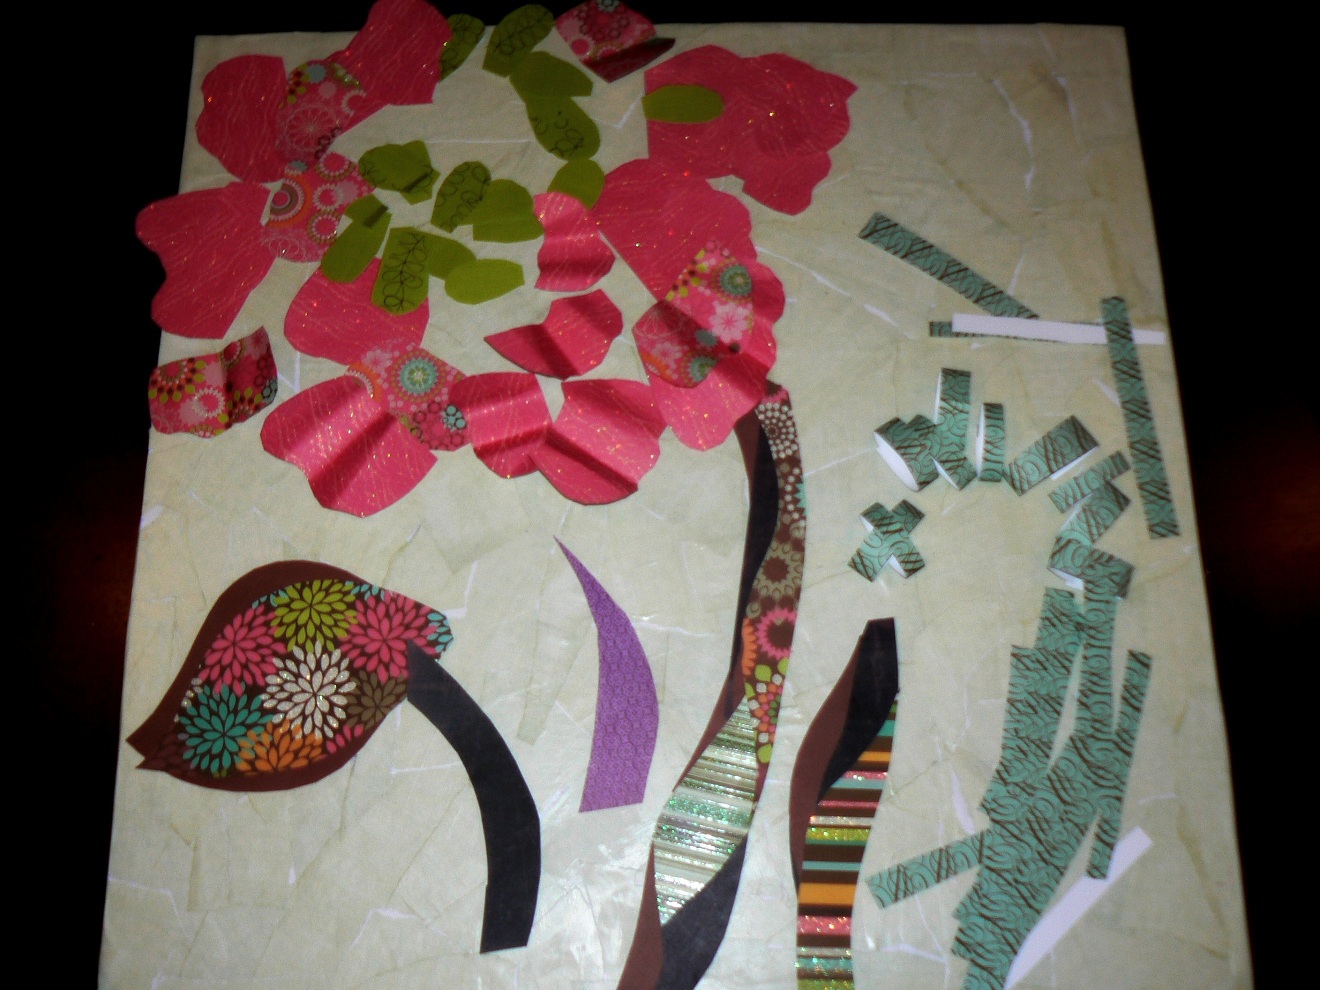
Step SIX: Start cutting your scrapbook paper into shapes. You will need a different piece of paper for each element...for example, you need one piece for the flower stem, one piece for the petal, one piece for the leaf, etc..... So, cut your pieces out and lay them on top of your board to get an idea where they will be glued.....
...you get the idea....
Step SEVEN: The most important step.....POUR A LARGE GLASS OF WINE!!!......get ready!! we will be here for a little while! You will need patience, and you will need a wet rag to wipe off your oh-so-sticky fingers from all the modpodge lovin!! :)
mmmm....I can taste it now!!
Step EIGHT: Start gluing your pieces down. Again....use the same technique as step five!
Step NINE: This is where the fun begins!! Do you remember when I was talking about textures and movement....Well we are going to attempt that with the flower!! In my head, I see the petals coming off the board...like 3D...so to achieve this look, I will fold each individual petal in multiple spots.
So far so good......
Step TEN: Now for the Challenge!! We need to glue each folded piece down, while still being able to get the 3D look....here we go!! Put a layer of modpodge on the bottom of each piece, then a layer on top and hold it down, with a finger in between each fold....hold it for a few seconds until it sticks! Don't worry if you have globs of glue in certain areas....the beauty of modpodge is that is dries clear!!
This is where the patience is needed....and maybe a refill on your wine!! :)
So after a couple of hours....(YES, you heard me right).....of gluing you will have a masterpiece that looks like this!......
I thought it turned out pretty fantastic!!!
If you are wondering about the cost...it was actually REALLY cheap!!
Board = $7
Primer = $3
ModPodge = $9 (I got the big boy)
Paper = $10 (I got the pack of assorted paper 1/2 off at Hobby Lobby)
All the other supplies I had.....
Here are the Details........
I think the 3D effect turned out pretty cool!!!
This is a better angle! The petals curved beautifully!!
For the center of the flower....I first made "tabs" with my green paper to give the flower another layer of color. This was easy, you just fold the tabs then only glue the bottom part down! I then used a few buttons for the center! (you know me...I always like to add in a little something extra!!)
For the small flower, i used the same technique as the large pink one...i just reversed the order! I made tabs with the blue paper for the outer layer, then folded the purple paper for the inner layer of the flower....Then I again used buttons for the very center!
You can really see the 3D effect from this angle....
One more "additional" texture that I added.....I used a piece of twine to "outline" the stems....I thought this gave it another dimension! Then as you can see, i cut out little flowers to make polk-a-dots around the whole board....
And there you have it!!! A 3D decoupaged art!!!
I actually did two other coordinating pieces to go with this......however I will save those for a rainy day when I have creative block!!!....hahah..(EVIL LAUGH)
Until then....who is going to attempt this fabulous decoupage technique!!! :)
P.S....to see the parties I am linking to go HERE!