So basically........TRUST YOUR CRAZY IDEAS!!
Tuesday, June 14, 2011
Just a little something to think about......
Monday, June 13, 2011
Weekend Rewind
As most mothers out there know…when you have kids, you are automatically on their schedule!! No matter how much planning you do (which by the way, is my favorite thing in the world), your day never turns out exactly the way you think!! Our days seem to be split in half….there are the activities before Julia’s nap, and those after Julia’s nap! I never interfere with the glorious naptime, because that is also MY naptime!!
We started off our Saturday morning with a trip to the lake! Julia LOVES playing in water, however this was her first time on a boat......
Geared up and ready to go!!
I think she felt like she needed double safety! The life jacket wasn't enough.... she needed to sit in the innertube also!
Julia and her Nanny! I love how the water looks in the early morning!
Me and Daddy K!
swimming time! I never knew how hard it was to tread water and hold up a one year old!! I could never make it as a lifeguard!!
16 already???
Now if you're really good, you can steer with your feet!!
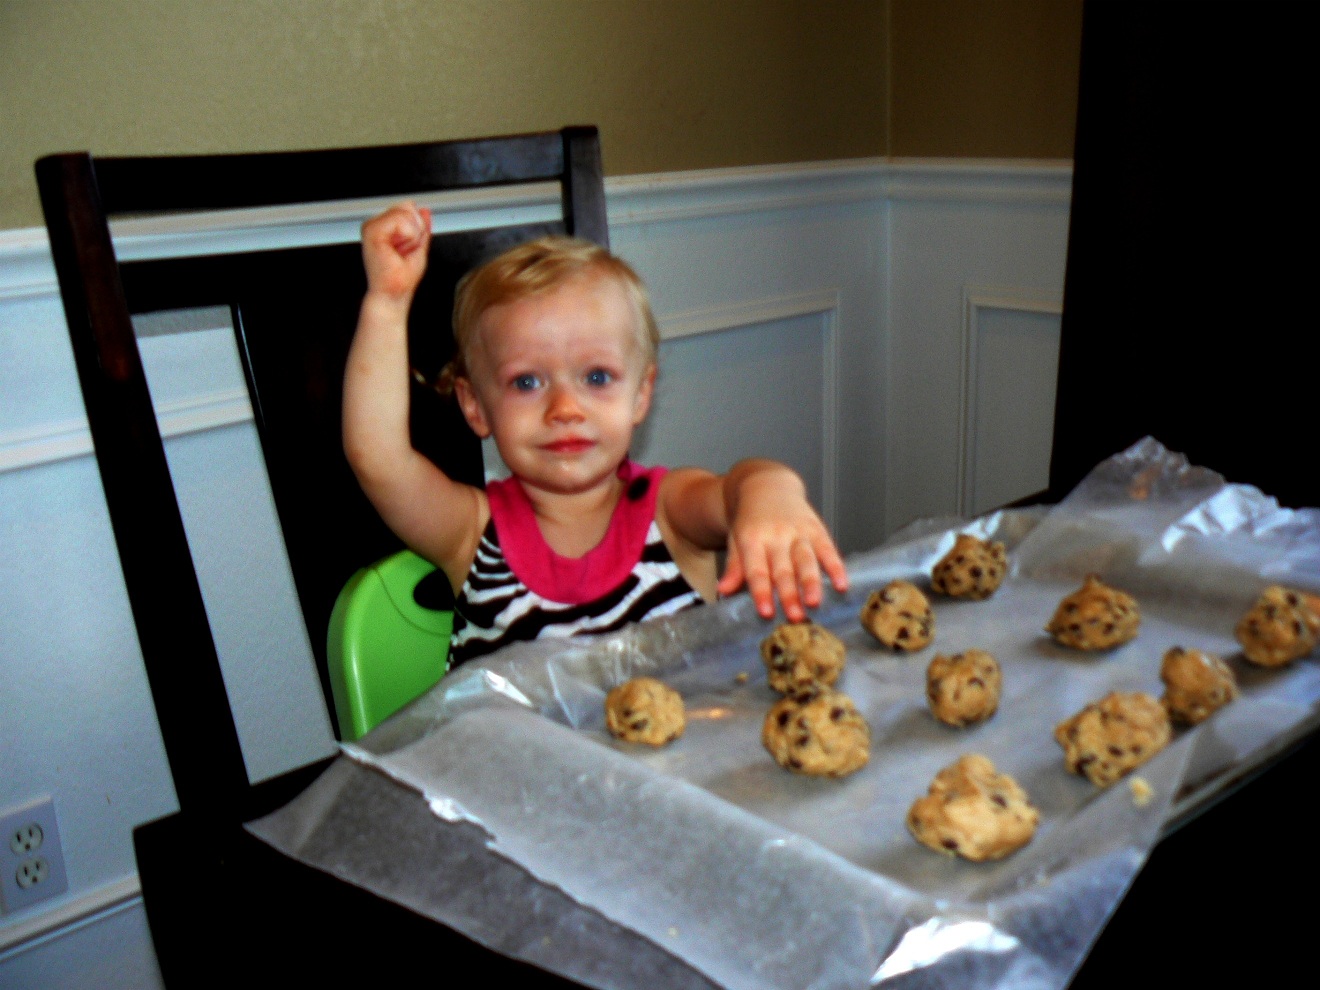
After we got home and were recharged from a 3 1/2 hour nap...(yes that's right!) it was time to make cookies!! yeaaa!!!
raw cookie dough..mmmm....slightly out of reach!!....pure torture!!
rollin the dough.....
Yes!! we're finished
time to bake.....
8 minutes later.....
And to round off the day....(after Jules went to bed)....I whipped out another Subway art painting! This is for a family friend......
this is the boy version!!
To see the full tutorial on how to make this go here. The details on this are different than the painting I did for Harper. I made a yarn-wrapped letter "C" for the top right corner.....I used scrabble letters that spelled out "its a boy" down the left side, and I took some white yarn and wrapped it around the bottom of the canvas!
Well....that wraps up our weekend! Did anyone else do anything exciting??
Friday, June 10, 2011
Interesting PINTEREST-ing........
Who out there has heard of Pinterest??? OMG!!! If you haven’t, please stop everything you are doing and go here…..
I feel like I am living in a whole new world of awesomeness!! It’s so refreshing, so inspiring, it’s where I go to fuel my creativity! Warning!! It’s VERY addictive!!
I could browse through these images for hours, days, weeks and still want more!! (this is without a doubt my new obsession) The one week I have been a member of Pinterest, I have become so inspired that I feel the need to share the love…..
First, let me prepare you… the images that I am sharing will most likely be random and all over the place, they have no order, some have no meaning…… You will see images that are so intriguing they make me pause, or deserve a second look, others inspire me to create, and then there are those that just make me smile!
Are you ready?? This is what caught my eye this week…..
Burlap Bulletin board! hmmmm....this looks easy to make!!
Simple glass mason jars filled with rice! I love how clean and simple the look is!
Wood plank sign.....maybe this will be my next project!!
I just LOVE tiny things!!!
If you can see past the screaming baby....look up! I NEED this flower mobile!!!

This is such an eclectic setting! I love that it's outdoors, I love that it's rustic, and I love the floating frames in the background!!
Wooden stacked lamp stand! How Creative!! I have never seen this look before! I would definitely need Daddy K's assistance to attempt this project!!
I could spend all day in this summer bungalow!.....that is if it weren't 100 degrees outside!! :)
I am lovin the colors in this room!!
Ruffled lamp shade....super cool!
And last but not least....i'm hoping this will be me sleeping in tomorrow morning!! :)
Stay tuned to see what crafts are made from these inspiring pictures!!
Wednesday, June 8, 2011
Serious Cuteness.....
While walking through a local art shop in Dalton I came across an ultra cute painting!! It was an owl, sitting on top of a turtle, sitting on top of an elephant!! I wish I had a picture for you…but believe me!...It was sooo stinkin cute!!!!! The pattern was clean, the colors were simple, and I immediately envisioned it hanging in Julia’s room.
Well, you know me….I never buy anything decorative, I just stare at whatever it is long enough to figure out how to re-create it, therefore making it my own!! Since, I don’t have much experience in painting, ideas were bouncing though my head! Finally, I got it!!! I could decoupage the art!! I’m telling you…when you combine decorative cardstock, modgepodge, and a little creativity…. the possibilities are endless!!!
Because I made this 6 months ago, I do not have pictures for a complete tutorial! Forgive me please!!!! I can however, talk you through the steps I used to make this little piece of beauty!! I will warn you….it’s very simple, but pretty time consuming.......Here is a sneak peak of the final outcome....
Ok!!!...now that I have you hooked, let's give it a try.....
Supplies
Canvas (I used 24x30)
Decorative cardstock (you can buy these in books with coordinating patterns)
Scissors
ModgePodge
Step 1: I always like to plan out my artwork (imagine that!!) I did a quick sketch of what was in my head, tweaking it, until I got a good idea of the look I was going for!
The artwork that inspired me was much more simple than this. I altered the shape of each animal and added a few cutesy things such as the bird, the umbrella, flowers and bows....
(don't worry, the below steps will all make sense when you see the completed artwork....stay with me)
Step 2: Take the decorative cardstock and start cutting out shapes. You need a different piece of cardstock for each element. For example: You need one piece of cardstock for the elephants body, and different piece for his ear, another for his eye, etc, etc....This is the time consuming part! (You may have to do a few trial cuts to make sure your scale is right to fit the canvas.)
Step 3: Decide on your background. Choose one cardstock pattern for your background! I wanted an old vintage look so i went with a "newspaper" looking pattern. You will need a lot of pieces to cover the entire canvas! I think I bought about 15 sheets of this pattern.....
Step 4: (this part sounds scary, but trust me!!) Start ripping up the pattern that you are using for the background... it doesn't matter what size or shape each piece ends up being! Once you have a few sheets ripped up, start gluing them to your canvas. Use the modgepodge for this! Put a layer of modgepodge on the canvas, start overlapping all of your ripped pieces of paper, then put a thin layer of modgepodge on top to seal it! Work your way around the entire canvas, making sure to also cover the sides!! Please Note: if you use too much modgepodge your cardstock will start to wrinkle!....we don't want that!! take your time, use only a little, wait for it to dry, then re-apply if needed!!
Step 5: Once the entire background of your canvas is dry, you can start building your art!! This is the fun part!! Start putting the shapes together that you cut out in "step 2"...Don't glue anything yet! Just place everything where you want it to go, that way you can alter anything that you aren't happy with!!
Step 6: Decide if you want to use textures!!! You know I couldn't leave this part out!! I added ribbon to the elephants tail, a button to the turtles eye, sticks for the owls legs, and more ribbon for the umbrella handle! These are just small details, but I feel it gives the artwork a whole other dimension!
Step 7: Get to gluing! Once you know where all of your pieces of cardstock and textures are going, start gluing them down with the modgepodge. Use the same technique as we did in "step 4" (glue the pieces to the canvas, then put a layer of modgepode on top to seal in the beauty!!)
Okay, so now that i'm done talking your ear off with instructions, I know you are dying to see my little masterpiece!!.......Taaddaaa..........
I thought it turned out super cute!!!!
Notice the ribbon I used for the umbrella holder, the twigs for the owls legs, and the hand drawn eyelashes using my handy dandy magic marker!!
I used a black button for the turtles eye. I also cut out random imperfect sized polk-a-dots for her shell!
Here is the ribbon that I added to the elephants tail.....
and we can't forget the little birdie....I also hand drew his hair and legs.....
Notice the background in each picture....by ripping up the background pattern, (step 4) you create nice, subtle texture! I almost forgot that I also added little flower polk-a-dots randomly around the background! You can see this in the above picture!
Last but not least, always sign and date your work of art, hang and enjoy!!!
I hope my directions were not long and drawn out!....next time I will have a detailed picture tutorial for you!!....and I say next time, because my friend Angie at Angie Rogers Photography, has asked me to make a few pieces for her girls room! Stay tuned to see what else my crazy brain comes up with!!!........
Monday, June 6, 2011
Waterslides and Finger painting!!
What do you do when summer has just begun and it is 100 degrees outside?? That’s right!!....break out the waterslide! We had a lot of fun with this while celebrating our niece's 4th birthday!
Julia and Daddy K! She has no idea how much fun she is in for!!!
haha....there was no easing into it!!! Kevin just let her go!! It looks like she is trying to hang on for dear life!!
No worries....she wanted to go again, and again, and again!!
haha...that expression is priceless!!! I love it!!
You know it's time to get out when the teeth are chattering!!
Once our wet and wild afternoon settled down it was time to break out the figerpaints!! I love love loveeee to fingerpaint!! I loved it as a kid, and I still love it now!! There is just something about having a gooey colorful mess at the tips of your fingers ready to create anything your little heart desires!!
Today we are making handprints with our paint!! I have been taking handprints of Julia since she was 6 months old, in hopes of making some sort of art later down the road! Today it was time for the 20 month handprint!!!
Julia's tiny little hand in a bowl full of white paint!!
Normally we have to try this multiple times, but it looks like we have a winner here!!! Thanks Daddy K for the assistance!!
Yep!! Worked on the first try!!
I couldn't let her stop with the just the handprint! It's time to get messy!!
ohhh, the concentration!!! We have a little artist in the making!!
I now have 4 handprints of Julia....6 months, 9 months, 12 months, and 20 months....(it should have been 18 months but I was a little forgetful!!) oh well......
I did each print on a different color paper and I dated each at the bottom! There are thousands of ways you can display this! I like the one above because it is very simple and clean! Soon, I will buy matching frames so it will have more a "finished" look.....
here is another fun way to display your art! Just hang twine across your wall and clip the handprints to it! So easy!!
Friday, June 3, 2011
Wednesday, June 1, 2011
How can 10 years slip away so fast????
Football games, Friday night parties, Study groups, and Friendships! These are all great memories of my high school years!! It’s hard to believe I’ve been out for so long!! I graduated in the Class of 2001…which, if you can count back, you know what that means!!!…..it’s time for the TEN year reunion!!
When I got word it was time for our reunion, I was sooo excited!! After all, when high school ended I left my home town! I went away to college then four years later I ran off to Atlanta for my first “real” job! The only time I visited the tiny town of Childersburg was for the holidays! Therefore, I had a lot of catching up to do!! With only 87 people in the graduating class it was hard not to be friends with everyone!! I’m happy to say we were a very close senior class!
I was honored when the reunion committee asked me to make the centerpieces for this event!! I had a ba-zillion ideas running through my head! I wanted simple elegance with a rustic twist, while still incorporating our school colors (blue and white.)
It was sooo easy to make! If you would like to make this for your home, you will only need a few inexpensive items……
*Glass Cylinders (3 varying sizes) I purchased mine from Amazon.com
*Floating candles
*Riverstone (Hobby Lobby)
*Decorative flowers (I found mine here at Accents and Petals on Etsy....my new fav shop)
*Yarn, twine, ribbon (colors of your choice)
*Double sided tape and scissors
1. Cut 3 pieces of ribbon/yarn/twine. (I experminted with the legnth!) Wrap each vase with a different material. Attach the ends of your ribbon/yarn/twine with double sided tape to the surface of the vase. I like using textures so I wrapped my cylinders with a thick yarn, satin ribbon, and thin piece of twine! i also wrapped each material at different heights on each vase to create more interest.
2. Attach a decorative flower to either your ribbon/yarn/twine then wrap around the tallest vase!
3. Pour your riverstone into the bottom of each cylinder! Again, you can experiment with how much stone goes into each one.
4. Add water and the floating candles to each vase.
5. Arrange any extra decorative flowers along the base of your cylinders to add more interest!
6. Enjoy your beautiful centerpieces!!
I also made the table runners! This was my first sewing project, so I will have to thank my mom for the speedy lesson!! I got my inspiration from Living with Lindsay!
Here is a closer look at the runners! I gave it a fancy name!.... modern pleated ruffle runner! :)
I also put together an arrangement for the food table! I kinda cheated on this one!!...I rounded up some materials from my wedding and put them to good use once again! See below!
You can never go wrong with a simple vase with flowers and sticks!! (This has actually been sitting on my dining room table for some time now!!)
Here is an up close look! You can see how I hung glass tealight lanterns around the sticks to add extra flare!!
And to finish the look off....a burlap table runner with more riverstone, and a few candles! Easy Easy!! Anyone could do this!!
Now that the decorations are done, it's time to enjoy the party!!!
Mama J and Daddy K getting their dance on!!
It was great catching up with old friends!! On the far left is my best friend since I was 4 years old!! I love you Amanda!!!
Just the gals!!
It was great seeing everyone at the reunion!! I can't wait until our 20 year!! oh, wait!! That means i'll be 10 years older!! yikes!!! :)
Subscribe to:
Posts (Atom)