Sunday, August 28, 2011

The Itch....

I've got the itch!  No!!... not the itch to have another baby and not the itch to move....I've got the itch to redecorate!  And when I say redecorate, I don't mean shifting things around....I'm ready for a NEW LOOK!  I want new paint colors, new hardwood floors, new drapes and pillows!  I want new art, new bedding, new organization!  I'm ready....I'm pumped....Pinterest has completely inspired me!!

Let's start with this wall color!!  Revere Pewter by Benjamin Moore!  I'm in L.O.V.E!!!  I want a grey room!!  I NEED a grey room!!  We have a three day weekend coming up!!....I think I know what I may be doing!!


Isn't this a beautiful color palate!!  I am loving the grey with accents of yellow and purple!!   


Ohhh, the drapes!!  Mr. Orange...you are such a tease!!!  Mom...I may need a few more sewing lessons!  :)


Pillows, pillows and more pillows!!  Don't you just love the silhouettes!!  Mom...after you show me how to sew curtains, you may need to teach me how to sew a pillow!!    


A vintage window as a room separator!!   hmmm....where could I put this??


If I can't find anywhere to hang the window, I could use it as wall art!  I love this look!!


Dad...Even though it is August and 99 degrees outside.....can you please start chopping your winter firewood and save me a few pieces!  I NEED this coffee table!!  


Oh...and Dad....while you're helping me out, do you have an old wooden ladder laying around??  This would look fabulous hanging on my wall, don't ya think??  


I know, I know...mom is helping me sew...dad is chopping firewood.....It's Daddy K's turn now!!

Daddy K...can you please build a coat hook like this???  It would look perfect in our foyer!!  Pretttyyy pleasseee (batting eyes) 


Ok, ok....now that everyone else is helping me put together my "dream" house, I think I can handle the accessorizing!!

Wouldn't this be great as kitchen art!!


I NEED floor to ceiling frames in at least one room in my house....maybe the bedroom??


They could be frames of cool silhouettes like this!!  


A huge framed chalkboard under the bar!!  What a great accent....and Jules would LOVE it!!


I really want to make a vintage mirror like this!!  It's so beautiful!!!  Mirrors can really open up small spaces!


source unknown
For the love of yellow!!  I must incorporate this accent color into my home!


What a great idea for a magazine holder!!  I'm sure I have one of these buried in my basement somewhere!!


Outdoor lighting!!  I could so make this!!  DONE!!


Shelving above your drapes!!  Excellent idea!!  Daddy K....I may need your assistance again!!


Ok, I think that will wrap it up for today!  My inspiration images could go on for days!!  I guess I should also mention that each of the above images are on my to-do "dream list"...and until Daddy K reads this post, he has no idea about my plans to redecorate!!  :)  oh well!!  who said a girl can't dream a little!  Stick around to see what all gets accomplished!!  Until then, this is the quote I'm living by.....


 To see the parties I'm linking to go HERE!!

Thursday, August 25, 2011

The Versatile Blogger Award


MY FIRST BLOG AWARD!!!


Emily at Mirrors Metaphors and Kaleidoscopes has just awarded me the Versatile Blogger Award!  woohoooo!!!  I'm honored, I'm speechless! Thanks so much Emily!!


There are 3 rules you must follow after accepting this award!!
  1. Thank the person who gave the award and link back to them in your post.
  2. Share 7 things about yourself.
  3. Pass this award along to 10 recently discovered blogs.


7 interesting facts about me....
1.  I am bored if I don't have 100 things to do at once!
2.  I will set my alarm clock, check, and re-check it 5 times before I can peacefully go to sleep!
3.  I have a fear of food being in my teeth!
4.  I love making lists!
5.  I bleed Crimson!!!  ROLL TIDE ROLL!!
6.  I design rugs for a living!
7.  My dream job would be sitting at home crafting all day long!!


Here are the 10 blogs that I am passing this award to!  I love reading each of these, and hope you will take a moment to check them out!!  Congratulations to.......


Tuesday, August 23, 2011

We Survived.....

The 3 day potty training is over!!    

After living in only our den, barely having time to take a shower, only playing in the floor, and scrubbing the carpet after every accident....I'm happy to say we survived! Here is how it all went down......


*side note....Julia has been wearing pull-ups for 4 months.  We practice going to the potty.  Sometimes she goes, sometimes not.  She has never had an accident free day!


Let's start with the basics of the "3 day potty training method"...I found this method through Baby Center!!


1. It's best to use this method on kids under 28 months! That way they are not as resistant!  (Julia is 22 months) 


2. Your kid will have no clothes below the waist for 3 days!  They call it the "bare bottom" method!  (We actually just let Julia run completely naked!)  She absolutely loved it!! hah


3. The only time you can put a diaper on them is at naptime, or bedtime!  Very important...DON'T GIVE IN!!


4. Figure out a reward for your kid after they successfully pee in the potty!


5.Day one - you can't leave your house!  Day two - you can leave once in the afternoon for an hour (no diaper)!  Day three - you can leave once in the morning (no diaper), and once in the afternoon (no diaper) for an hour!


6.  After the 3 days of your bare bottom kid running wild, you can return to clothes, however NOT diapers!!  If you put your kid back into diapers it will reverse what you have taught them!  You can only wear diapers at Naptime, and Bedtime!!  VERY IMPORTANT!!


Okay...now that we know the basics, I'll give you a quick summary of our weekend......


DAY ONE....When Julia got up on Saturday morning, I told her we were not wearing diapers anymore because she was a big girl now....and big girls "tee tee" in the potty!  I put her baby potty, and the potty seat in the closest bathroom, then I stripped her down!!   (She absolutely loved being naked!!  She ran wild all weekend!) 


 I gave her lots of juice, and water based foods so that she would have to pee more often...the more practice, the better!  You know the routine...If they start to pee on themselves, pick them up and put them on the potty.  After they pee on themselves enough they will start to understand!  For the most part, Julia would either run towards the potty when she needed to go, or stop and "hold" herself!  She has been really good at telling me when she needs go!  


After she successfully peed in the potty her "reward" was washing her hands....I know it sounds crazy, but she LOVES washing her hands and playing in the water!  Every time she ran to the sink to play, I told her she had to use the potty first!  This tactic worked pretty well!! 


We did have our fair share of accidents...5 on Saturday!  Each time she had an accident, I would have her help me clean it up, and then tell her we don't pee on the floor, we pee in the potty!  After a few accidents happened, I made the rule that we would only play in the floor....no sitting on furniture!  


I won't sugar coat it at all....Day one was tough....we were confined to one room, had to watch her every move, and did not even have time to take a shower!  By the afternoon, Daddy K and I worked in shifts! :)


DAY TWO:  A bit more successful!  I again reminded her that she was a big girl now, and big girls no longer wear diapers!  Sunday was pretty much a repeat of Saturday with less accidents.  We only had 2 on Sunday!  I was a bit nervous about taking her out for an hour on Sunday afternoon, but I was determined to stick to the plan!  We went outside to play with a neighborhood friend!  And I'm so proud to say Julia did EXCELLENT!!  We used the potty when we got there, she told me twice that she needed to go, then we used it before we left!  So NO ACCIDENTS!!!  


DAY THREE-  A COMPLETE SUCCESS!  Julia had NO ACCIDENTS allllllllllll day!!!!  I was so excited!!!  She took two trips out of the house...one in the morning, and one in the afternoon...both without diapers on, and she did perfectly!!  I am such a proud mommy!!


You may be wondering what's next??  Well, the training really doesn't stop after 3 days.  I think it just takes that long to "shock" their bodies into learning a new routine.  For the next 3 months you have to practice, practice practice!  When they go out they need wear loose clothing...but NO DIAPER...and when they are at home, they can continue to run bare bottom!  After a while it will click!  


I'm totally a fan of this potty training method and would recommend it to everyone!  I hope my little experiment will help or inspire you to train your little one!!!  GOOD LUCK!


To see my link parties go HERE!!


Friday, August 19, 2011

It's that Time.....

I'm sick of buying this.....


Therefore, we have been practicing on this....


Now it's time to take it a step further.....so we are attempting this.....


If the Internet says it's guaranteed then it MUST be true right?? haha.....Well....I'll let you know come Monday!


I am open to any tips you may have!!! 


Wednesday, August 17, 2011

Daddy and Me......


There is nothing greater than the bond between a Dad and his little girl!!


(To see the Parties I'm linking to go HERE!!)


Monday, August 15, 2011

Patience + Hardwork = Appreciated Beauty!

Who would pass up Personalized Subway Art??


Subway art is EVERYWHERE right now!  And in most places it costs a pretty penny!  (For example, I saw one in ZGallerie this weekend for $400!!)  That's right, and because I refuse to buy art that I could possibly make,  I have decided that this shall be my next project!  And why not??  I would rather have a piece of subway art that is personalized to myself or my family rather than the generic "NEW YORK...FIFTH AVE....." type art that you see everywhere!  


As I've mentioned in the past, I'm not a painter, so I knew this project would be a bit of a challenge for me. After doing a lot of research on a technique I could use, I landed upon one using contact paper for a Letter Transfer!  I thought this would work perfectly since I have a fear of painting perfect letters!

I have an image in my head of what I want the art to look like.....I want it Large, Textured, Vintage Looking, and Slightly Mulitcolored!  So, with that in mind, let's start creating!!

STEP ONE:  Make a plan!  You need to have an idea of what size canvas to use, and the words you want on your art!  I chose to do words that describe our family!  I used many of our family values, our last name, our colleges, birth dates, wedding date, house number, state we live in, near by highways, our favorite football team....etc  The possibilities are endless, you can do ANYTHING!!!

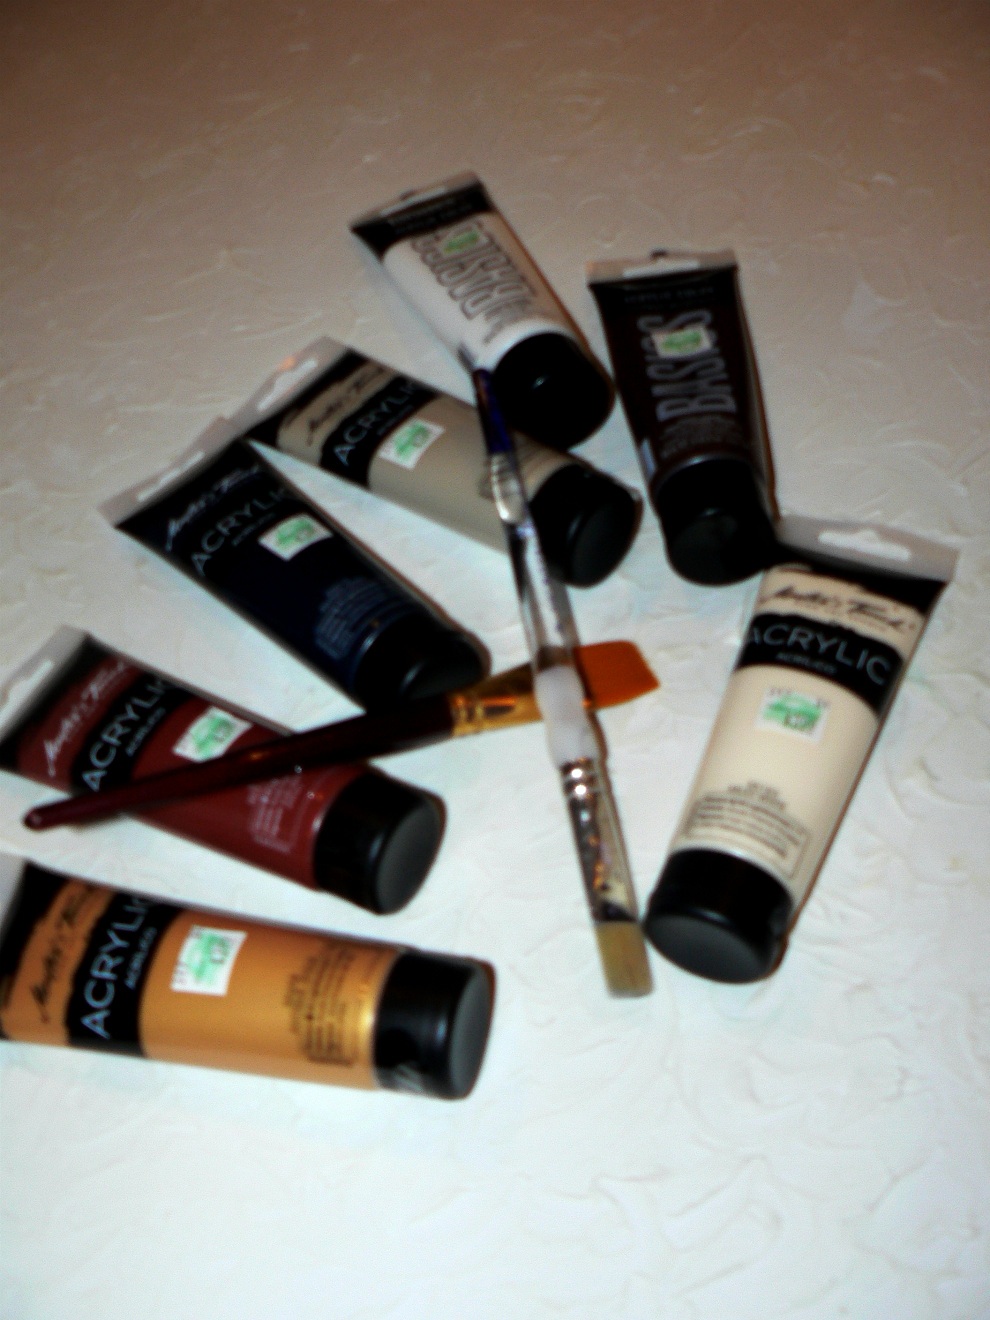
STEP TWO:  Buy your supplies....
Canvas
Paint
Molding Paste
Scissors
Spray Adhesive
Contact Paper


STEP THREE:  Take the molding paste and spread it around the canvas to create a rough texture.  I used the tip of my finger and brushed it on!  There is no special technique here...just get messy and have fun!!


STEP FOUR:  Select your paints for the "first" background....this will be the colors that you see THROUGH your letters!  (We are kinda working backwards for this project!!)  Don't you just love how my mind works!!  :)


STEP FIVE:  Mix and apply your paint to the canvas.  It doesn't have to look perfect.  I used 5 or 6 different colors, creating light and dark areas all over the canvas!  (This is how I'm creating my "multi-colored" look.)


This is what it will look like when it's completely painted!  Don't freak out....remember, this will only be showing THROUGH your letters!  Make sure you have variation in your paint!  You want definite light and dark areas so the final outcome will look very textured and vintage like!!


Here is an up close picture of how the paint looks on top of the molding paste!  Pretty cool huh!  


STEP SIX:  Create your word layout on the computer program of your choice.  Print it out the same size as your canvas!  I took mine to Kinko's because it was VERY large!!


STEP SEVEN:  Attach contact paper to the back of your print out with spray adhesive.  WARNING:  make sure you glue it to the font of the contact paper....NOT the side that peels off!!  (Later you will want to peel off the back to stick the letters to the canvas.....)


After it has been glued and trimmed it should look like this!


STEP EIGHT:  This is the part that takes a while....and when I say awhile, I mean days!  Get a pair of very sharp scissors and cut out each letter!  YES, you heard me exactly right!  EACH LETTER!!!  Now, I know a lot of you will want to throw in the towel by now, but stick with me here!!  Believe me, in the long run this technique is sooo worth it!


STEP NINE:  After each letter has been cut, place it on your canvas where you want it to go.  Make sure to position every word before you start sticking the letters down, in case you need to adjust!  (I had to adjust mine 3 or 4 times until I was happy with my placement.)  Now, once every word is in place, peel off the contact paper from the back of each each letter and stick it to your canvas.  You have to press really hard to get it to stick because of the textured molding paste.  


STEP TEN:  Once you have all of the letters stuck down, start painting over the entire canvas with your black paint!  This does seem a little scary at first, but trust me!!!  Again, I mixed a few different paint colors for this. Black, brown, and dark red.  I didn't want just a flat color on top, so I created a little variation....


Work your way down the entire canvas with your "black" paint.  It's okay if the paint accidentally gets under some of the letters!  In the end it will give it more of the vintage look which is exactly what we are going for!!


This is what your canvas will look like when you have completely painted over all of your letters!  Don't forget to paint the sides of your canvas!!


STEP ELEVEN:  After your canvas has dried, start to peel off each letter!  They will come off really easily!


This is what you should be seeing as the letters are peeled off!  I absolutely LOVE how the paint seeped under a few of the letters....it gives it a great vintage look, without me having to do a thing!!


Don't freak out if your letters or numbers look like my "8"....You may see the "8" as a mistake....I see it as really cool texture!  This technique makes each word appear as it has been stamped!  I LOVE IT!


And here is the final outcome!!  I couldn't be more happy with it! It's exactly what I had envisioned!! If you look close you can see how the different shades of color come through each letter!  


I have the perfect spot for this little masterpiece!  On our dining room wall!  It is so satisfying seeing a piece of art that YOU created, and that is personalized to YOUR family!  I just smile every time I walk by!!


To see the parties I'm linking to go HERE!!!

Tuesday, August 9, 2011

Surprise.....

Look what came in the mail today!!!.....


A beautifully patterned, perfectly wrapped box!! I wonder what's inside??  It could be anything!!!  


Oh yeaaa...That's right!!!  I won my first Give-a-way!! woohhoooo


12 crocheted coasters!!!  Aren't the colors beautiful!!!!


and......


An amazing handmade bracelet!!  It's the cutest thing ever!!  I could wear it with anything!!!


This is a much better picture!!!  :)


Thank you so much Amy at Green Eggs and Hamm for the awesome Give-a-way!!  Everyone should go check out her blog!  It's fabulous!!!