Tuesday, May 31, 2011

Memorial Day....Part 2

My Dad recently bought a new grill, and gave Kevin the honors of making the first meal!!  We thought a Memorial Day cookout would be the perfect time to break it in!!!

Look how perfectly new and shiny it is!!!  ohhh, it just makes me smile!!

We (or should I say Kevin) grilled oh so yummy ribs, and mediterranean grilled vegetables!

mmmm.....is your mouth watering yet??

Kevin hard at work!!

This was our spread!!  bruschetta, couscous salad, mac and cheese, coleslaw, mediterranean vegs, and last but not least RIBS!!  


Until Kevin will release his famous Rib Recipe, we will have to settle for the Mediterranean Veg's......Enjoy!

Mediterranean Vegetable Recipe!!

3 large portobello mushrooms
1 medium red, orange and yellow pepper
1 medium zucchini
10 fresh asparagus spears
1 small onion, cut into rings
3/4 cup grape tomatoes
1/2 cup fresh sugar snap peas
1/2 cup fresh broccoli florets
1/2 cup pitted Greek olives
1 bottle Greek vinaigrette
1/2 cup crumbled feta cheese

1.  Slice the mushrooms, peppers and zucchini!! Place veg's in a large plastic bag.  Add asparagus, onion, tomatoes, peas, broccoli and olives.  Pour vinaigrette into the bag...toss and turn the bag until all veg's are evenly coated.  Refrigerate for at least 30 minuntes...or in our case, a couple of hours...whatever you would like!! :)

2. Drain excess marinade from the veg's.  Throw them into a grill basket and cook for 12 or so minutes.  I like to do a lot of taste testing before they come off the grill. 

3. Sprinkle with feta cheese, and chow down!!!

This recipe is soo good!!  I just can't get enough!!

If you would like to see the origianl recipe you can check it out here.....


Memorial Day.....Part 1

There is nothing like freezing water splashing you in the face at 9 in the morning!!  Especially when it is from the Ocoee!  This is how Kevin, myself and our friend David started our Memorial day bash!.....

Helmet...check!....Life jacket...check!....All geared up and ready to go!!


It was such a beautiful morning!


We made ourselves get into the water before having the shock of the first splash!!  Notice the "Danger" sign above our heads....wondering what is beyond that sign??  See below!

They call this rapid the "fluffy bunny.....of death" hahha  J/k...this is not a real rapid!  It's the dam at the beginning of the river!

No turning back now!!  Kevin and David braved the front!  I sat safely in the middle!  :)

Yes, this is Kevin "riding the bull" on the most violent rapid of the day!  Don't worry....He didn't fall in...he just fell back! haha

After the trip was over this is how we all felt! hah  I have no idea who this is, but she was having nice nap in a tree where we docked the rafts!


Next up.....The CookOut!!


Thursday, May 26, 2011

Subway Art

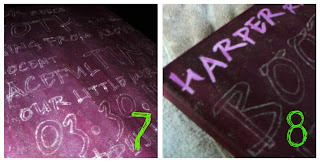
As long as we are still on the subject of baby Harper, I would love to share a “subway art” style of painting that I did for her!  If you are wondering what in the heck subway art is, take a peek at the below images!!


Essentially, subway art is a grouping of words put together in a way to create an interesting piece of art!  The words can describe anything!  It could be city names, family values or for today’s project…. baby birth stats!   I have been seeing this uber trendy style of art all around my crafty blogs, and have been dying to try one out!  So baby Harper gets to be the test subject!! 

Besides my college “color theory” class and the one “watercolor” class I took, I honestly have no experience in painting!  I know the basics of mixing colors but that’s about it!!  :)   With that said, I think it’s time to push my creative boundary!  How hard could it be?  My motto is..Imperfection = Beauty!!  So with that in mind…Here we go!!

Supplies:  Canvas, acrylic paint, brushes, chalk, sharp pencil, sandpaper (optional)


Step One:  Start with a blank canvas!  Any size!  I used a 16x20, purchased from Hobby Lobby.

Step Two:  Choose your color palate.   Since this is for a baby girls’ room I am using pink, purple, brown, and ivory.  (I like to mix my paint together and create my own fancy colors!)


Step Three:  Paint the entire canvas (top and sides.)  Mine is not painted evenly!  I wanted to see depth and variation in the background color; therefore some areas are darker and lighter than others! (It also gives it more of a vintage look, which I am allll over these days!!)


Step Four:  (See Above) With the computer program of your choice, create the layout of your words.  I went back and forth playing with different options until I found one I liked.    All of the words are the same font, however I varied the sizes to create interest!  I intentionally left some dead space so I could add a little something extra at the end! Once you are pleased with your layout, print it to match the exact size of your canvas.  I took my file to Kinko’s and had them print it for me. 


Step Five:  Take your print out and color the entire back side of it with chalk!  (I know this sounds crazy, but trust me!!)

Step Six:  Tape your print out to your painted canvas.  Take a sharp pencil or pen and trace over the letters on your print out.  (I am terrified of free-handing text, so this technique will allow you to have guidelines when you paint!) 


Step Seven:  Untape the print out and see your chalk guidelines.  Don’t worry if it looks like a big dusty mess, the chalk will wipe right off without even knowing it was there!

Step Eight:  Paint inside your guidelines.  Don’t worry if it’s not perfect!  Remember my Motto!! 


(There were a few words I wanted to emphasize, therefore I painted them a shade lighter!)


Optional:  After the painting is complete, you can take a piece of sandpaper and gently rub across the top of the painting.  This will create a worn, vintage look! 


Step Nine:  Add the interest!!  In my case baby bling!!!  I love art with multiple textures!!  Therefore, I attached ribbon, painted buttons, a flower and some jewelry studs to the canvas.  (If you remember in step 4, I left blank spaces while creating the layout!  This allowed me to have room to place these extra accessories)

Step Ten:  Enjoy your art!!


This was actually quite easy!!!  I think I will make one for myself next!!  :)


Friday, May 20, 2011

Yarn Wrapped Letters

Ok, ok, I’ll admit it….I’m obsessed with Baby Décor! From making wall art, to handprints, to wreaths, to chandeliers…I just can’t get enough!!   Maybe it’s because I’m still a fairly new mom, and I love to decorate....Who knows...it's in my blood!!  All i know is that I’m constantly crafting up a new project for Julia’s room!......I’ll be giving you a sneak peek to those soon……

As for today, we are going to discuss a new baby that just entered this world!  Harper Reece Booth (isn’t that a beautiful name!!)  She is the daughter of two of our best friends, Jen and Kevin!!  Once I found out Jen was pregnant, crafting ideas were immediately flying through my brain!!  I knew I wanted to make some sort of wall art but I wasn’t sure what…..  I went to my trusty friend google and found this image……


Yarn wrapped letters!!  How creative!!  You always see the standard painted wooden letters over a baby’s crib, but I’ve never seen letters wrapped in yarn!!  So this became my project!!!  You can see the whole tutorial here……

It was very simple to do!  I added a little extra bling to mine.  With a few buttons, ribbon, and a flower…I have now baby-fied it!  And talk about inexpensive!!  All you need is the yarn of your choice and wooden letters (which you can find both at Hobby Lobby!)  If you don't want to buy the letters you could always cut them out of cardboard then wrap it…(that’s how I made the “B”)  I couldn’t find the size I wanted, so I drew my own letter on an old cardboard box then cut it out!!  Easy Easy!!  Here are the pictures of Baby Haper’s new wall art!!....

this project was a perfect fit for her room....


just a few buttons and a flower gave it the unique punch I was going for....


can you tell I have an obsession with buttons??  


And last but not least....here is the little beauty that lives in this room....

Jen, Kevin, and Harper...I hope you are enjoying your wall art!!!


To see the parties I am linking to go HERE!!


Wednesday, May 18, 2011

A Much Needed Vacation......and memory jar!!

Panama City Beach….when most people hear those three little words they think:  Spring Break, Beads, Girls Gone Wild!!!….However those three words have a different meaning for me.  Growing up, all of my summer vacations were spent in Panama City, it is where I made, and continue to make thousands of memories with my grandparents, but most significantly, this beach is where I met my husband!!   Yes…I’ll repeat that…I met my husband in Panama City  (no beads involved!!)

Now, I know crazy assumptions are swirling through your mind right now so I will make a very long story short…. With a broken down car, and Kevin to the rescue, I unexpectedly met my husband to be!  It was 1999, I was 15... he was 18.  I lived in Alabama, he lived in Georgia.  We exchanged email addresses and honestly thought we would never see each other again…..after a lot of phone calls, and plenty of miles on our cars, 8 years later, we got married!  Who would have thought!  So to sum up that story….. Long Distance Relationships really can work!!!

To this day we still have our annual PCB summer vacation.  Here are some pictures from a few weeks ago….

Julia loved the beach!!


She is a professional shell collector!


You can't go to the beach without being buried in the sand!!!


We chased the birds all day long!!!


Could the ocean be any more beautiful!!!  Look at all the shades of blue and green!!


Miller Time for Mama J and Daddy K!!


This was an amazing vacation for us!  We got to spend the week with my parents and my grandparents!!  A ton of memories were made!  This year I decided to create a Memory Jar.  I'm very excited about this!!  Not only because it can be a decorative item that will sit on one of our many shelves, but it holds concrete memories.  It's more personal and fulfilling than a picture!!  This will be the first of many to come!!

Our First Memory Jar...

Contents of the Jar....Sand from the beach, pool braclet, the shells Julia collected, a whole sand dollar, the reciept for the ingredients that we purchased to make Kevin's famous Seafood Gumbo, and last but not least...the bright green pony tail holders that held up Julia's first pig tails!!    I can't wait to look back at this in years to come and remember our special family memories!!

Monday, May 16, 2011

A Very Belated Mother's Day......The Silhouette Necklace

I never knew how special Mother’s Day was until I became a mommy!  It’s the one day set aside for loved ones to recognize how hard you work as a mom to keep the family going!!  And boy, I’ll have to say it’s a lot of work!!  It’s a day to feel special, a day to relax, a day to enjoy with the family, and a day to give thanks!

Now, I know Mother’s Day was well over a week ago!!  But in my defense, my mom has been out of town, and I did not want to post this tutorial until she had received her gift!  Forgive me mom….but this is worth the wait!!  J

The moment I saw this necklace, I was in love!!!  It’s so vintage, so trendy, yet full of meaning!  I thought this would make the perfect Mother’s Day gift!  Thank you lessthanperfectlifeofbliss, for giving me the idea!!


So here we go….This is sooo easy to make!

Supply list:  Scissors, pendants, chain necklace, decorative paper, and modpodge. 

Step one:  Buy your supplies.  I found everything I needed at Hobby Lobby.  The pendants and the chain necklace were in the jewelry section, and the decorative paper was near the scrapbooking area.

Simple Pendants.......
                                                             

I chose neutral decorative paper with a little splash of color......


Step two:  Find or take a profile picture.  (I love this snapshot of Julia because it shows off her pigtails!!  We waited 19 months for those bad boys!!)


Step three:  Open the picture in the design program of your choice.  You could use paint, photoshop, illustrator, etc.  Carefully trace around the face, hair and neck of your picture.  Then color the inside of the silhouette black, leaving the background white.  Next, play with the scale.  This was compete trial and error.  Keep shrinking the profile picture until it fits inside your pendant.


Step four:  Once you have your scale correct, with careful hands, and sharp scissors, cut around the silhouette!  Be extra careful cutting, so that you don’t change the shape of the profile!

I added mine and my brothers silhouette.....


Step five:  Cut your decorative paper to fit inside your pendants.  It doesn’t have to be perfect!  (see above)

Step six:  Now it’s time to assemble the pieces!  First, use the modpodge to attach the decorative paper to the inside of the pendant.  (Be careful not to use too much glue, or your paper will wrinkle.)  Next, attach the silhouette to the decorative paper.  After everything is perfectly in place, apply a thin coat of modpodge across the top of your beautiful piece of art to seal in the beauty!

Step seven:  Last but not least…let it dry (only 15 min or so) then weave your necklace chain through each pendant hook.  And Wahlah!  You now have a beautifully handmade necklace!!  I like this so much that I’m making myself one next!!


So for all of the mothers out there....Happy Mother's Day!  And to my mom.....For all of the days you said "just wait until you have children," I now understand!  It's not as glamerous as it sounds!  Being a mom is more than following the routine of feeding, bathing, and bedtime.  It's kissing the boo-boo everytime they whine and point to their toe, it's playing the peek-a-boo game over and over and over, it's being paitent while they reach thier milestones and become more independant!  It's tough, it's constant, it makes us who we are!  So for all of the Mother’s Days that I brushed off as just another holiday, I sincerely apologize!!  I now understand how special this day is!!  Happy Mother’s Day mom, I hope you love your necklace!

Friday, May 13, 2011

Taking a Moment.....

Here I am….looking at my life swirl around me; weeks feel like days, days feel like seconds.  With the blink of an eye another year has rolled around.  I feel like I just graduated high school…but in all reality my TEN year reunion is in 2 weeks!!  My little girl, that I swear I just gave birth to, will be turning 2 soon, and the house we just purchased has now been lived in for 4 years!!

Where has the time gone?  I seem to get so wrapped up in my everyday obsessions that I sometimes forget to take a moment and “enjoy.”  I need to cherish the moment where my little one reaches up to hold my hand (I hear they don’t do that when they are teenagers!), or watching her communicate with her pointer finger because the only word that comes out of her mouth these days is “Bah.”     So, in turn, one of my New Years resolutions was to just ENJOY….stop wishing my life away…stop PLANNING so much…(I can’t believe I just said that outloud….my husband would be so proud!!)

I’ve been tossing around the idea of starting a blog for a while now….Honestly, the first thought of it seemed intimidating….putting all of my thoughts, crafts, ideas out there for everyone to see!  How scary!  Especially since I’m definitely not a writer, I’m not the best speller, I seem to write lots of run-on sentences, and I LOVE to overuse punctuation….!!!  J J

But after a lot of contemplating, the idea became exciting!   This can be my outlet for the ba-zillion ideas whirling around in my head.  I can hope to inspire others with my creativity.  I can journal our special family memories.   All in all, I can use this to “balance” everything that makes up my life!

Thus, the journey begins; balancing the everyday obsessions that make me who I am, while enjoying each moment before it passes too quickly! ….  Welcome to my perfectly imperfect world!!   Is there anyone out there??  If so, I would love to hear from you!!